개요
이전 환경 설정 포스트는 아래 링크를 이용하면 된다.
[Airflow] 비트코인 일일 분 봉 데이터 파이프라인 프로젝트 (환경 설정편)
[Airflow] 비트코인 일일 분 봉 데이터 파이프라인 프로젝트 (환경 설정편)
개요 최근 Airflow에 대해서 공부해보며 데이터에 대해 간단한 파이프라인을 만들어 데이터베이스에 저장하는 프로젝트라도 직접 해보면 좋겠다 싶었다. 요즘 가격이 미친듯이 오르는 비트코인
bestech49.tistory.com
이 포스트에서는 실제 코딩을 통한 Upbit API 호출 및 데이터베이스 저장 과정을 다룬다.
Upbit API 확인
업비트 개발자 센터
docs.upbit.com
먼저 내가 사용할 API는 Upbit의 분봉 호출 API이다.
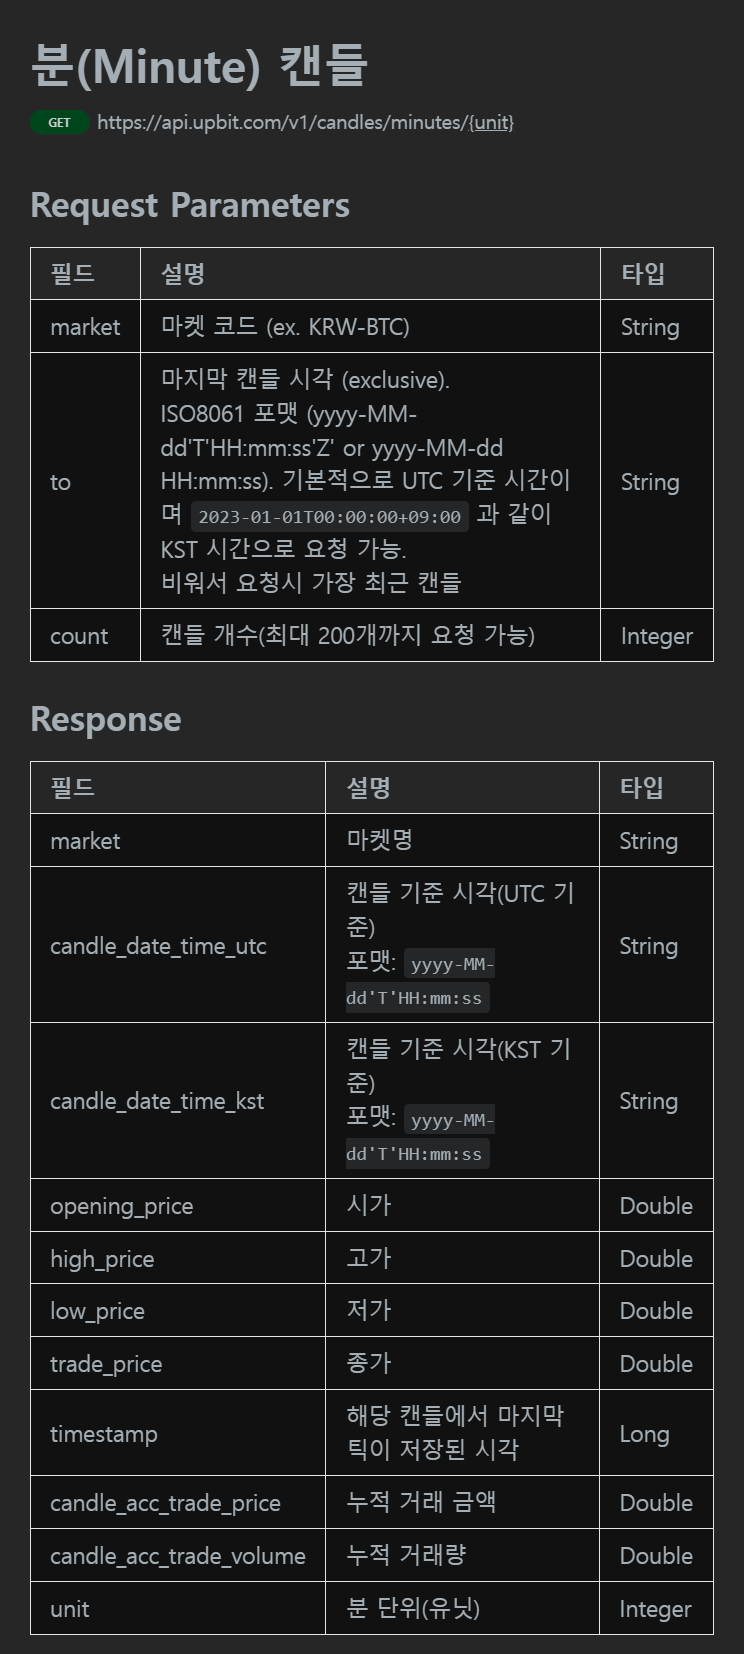
아주 친절하게 API 사용법이 다 나와있다. 이 데이터는 실시간으로 생성되며 매일 0시에 어제 하루 동안 생성된 분 봉 데이터를 받아오면 된다.
또한 다행스럽게도 이 API는 인증 없이 사용할 수 있는 API이기 때문에 나와 같은 간단한 프로젝트를 위해 매우 접근성이 좋다는 장점을 가진다.
위 API에 따르면 KRW-BTC의 최근 200개의 1분 봉 데이터를 받기 위해서는 아래 URL로 get 요청을 보내면 된다.
https://api.upbit.com/v1/candles/minutes/1?market=KRW-BTC&count=200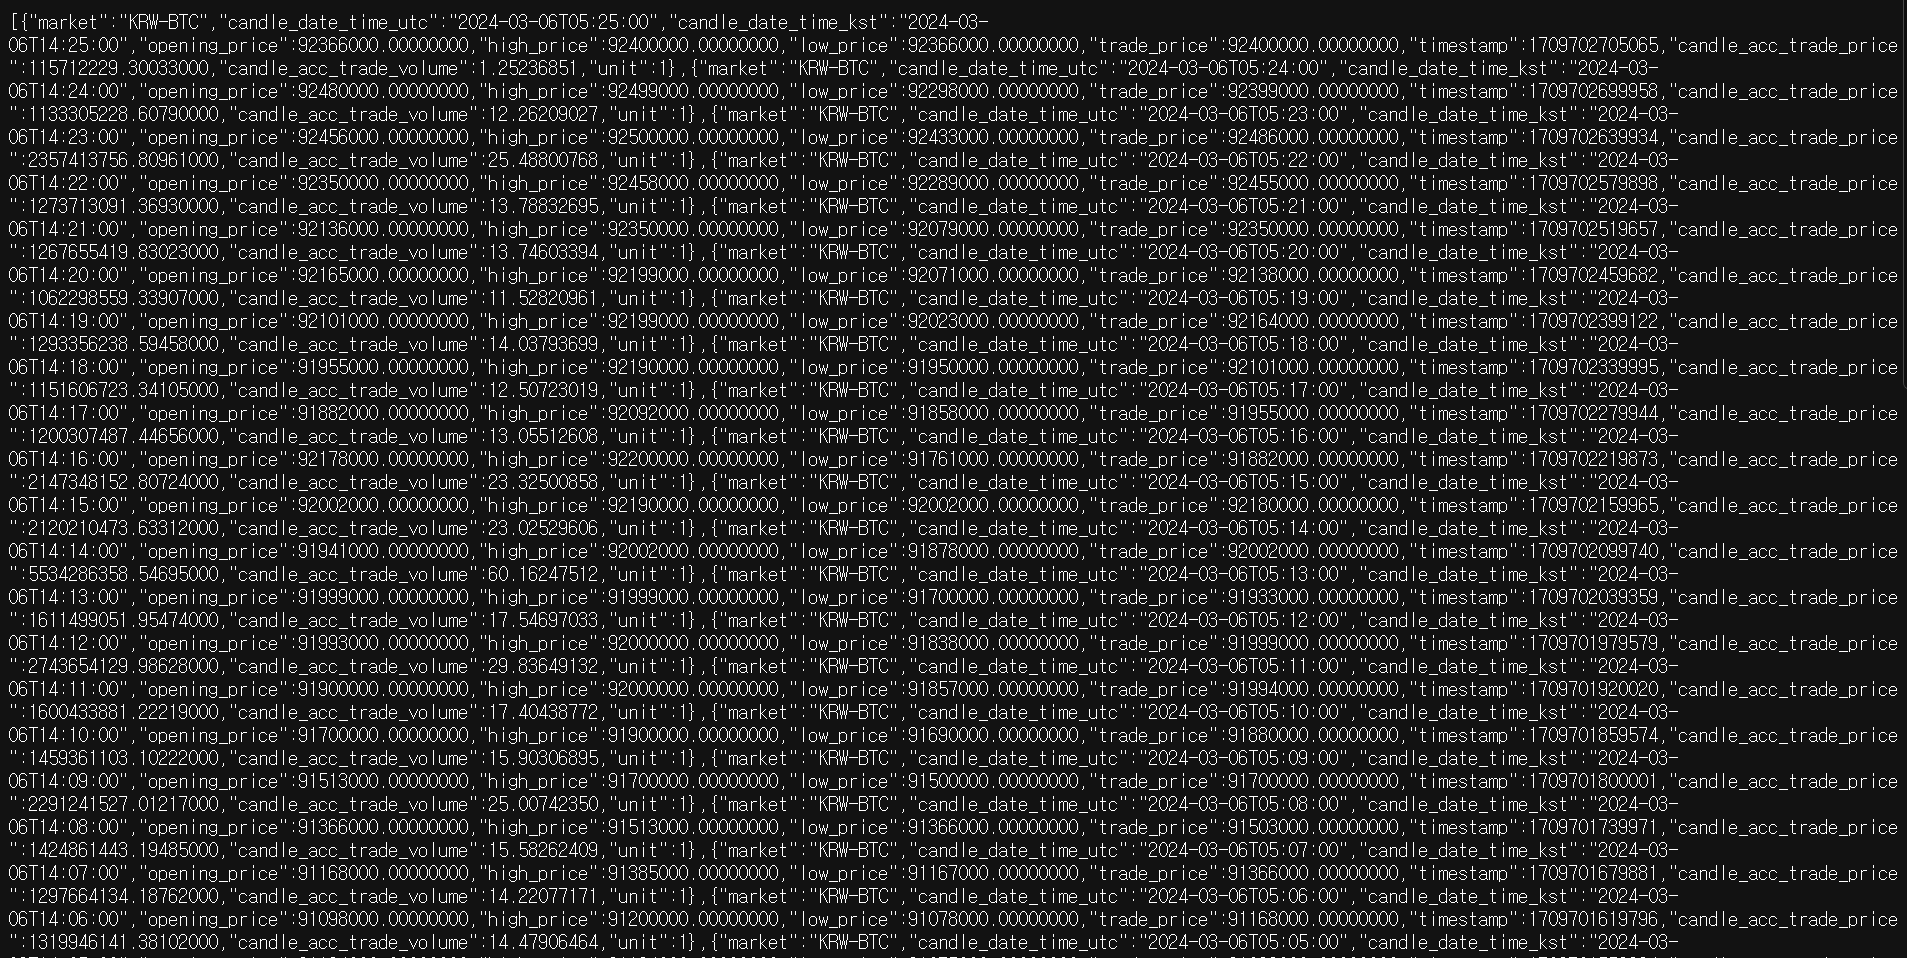
실제로 주소창에 쳐보면 위와 같이 오는 것을 확인할 수 있다.
1개만 받아 결과를 한번 자세히 보도록 하자.
[
    {
        "market":"KRW-BTC",
        "candle_date_time_utc":"2024-03-06T05:28:00",
        "candle_date_time_kst":"2024-03-06T14:28:00",
        "opening_price":92427000.00000000,
        "high_price":92487000.00000000,
        "low_price":92381000.00000000,
        "trade_price":92452000.00000000,
        "timestamp":1709702925730,
        "candle_acc_trade_price":718217026.11837000,
        "candle_acc_trade_volume":7.76896112,
        "unit":1
    }
]
먼저 리스트 형태로 오며, market에 symbol, candle_date_time_utc에 utc 시간대가 오는 것을 확인할 수 있다.
또한 OHLC가 각각 opening_price, high_price, low_price, trade_price로 오는 것을 확인할 수 있다.
마지막으로 해당 분봉 동안의 거래량은 candle_acc_trade_price와 candle_acc_trade_volume으로 오는 것을 확인할 수 있었다.
이를 통해 저장할 table의 스키마를 짜보도록 하자.
table의 이름은 ‘upbit_btc_1m_candle’로 정하고, 아래와 같이 정의할 수 있다.
CREATE TABLE upbit_btc_1m_candle (
    market VARCHAR(15),
    candle_date_time_utc DATETIME,
    candle_date_time_kst DATETIME,
    opening_price BIGINT,
    high_price BIGINT,
    low_price BIGINT,
    trade_price BIGINT,
    timestamp BIGINT,
    candle_acc_trade_price DECIMAL(30, 12),
    candle_acc_trade_volume DECIMAL(20, 12),
    unit INT,
    made_date DATETIME NOT NULL
) default character set utf8 collate utf8_general_ci;
MYSQL WorkBench에 아래 SQL 을 입력하자. (없다면 그냥 MYSQL을 켜서 테이블을 만들어주자.
use 이전에 만든 데이터 베이스;
CREATE TABLE upbit_btc_1m_candle (
    market VARCHAR(15),
    candle_date_time_utc DATETIME,
    candle_date_time_kst DATETIME,
    opening_price BIGINT,
    high_price BIGINT,
    low_price BIGINT,
    trade_price BIGINT,
    timestamp BIGINT,
    candle_acc_trade_price DECIMAL(30, 12),
    candle_acc_trade_volume DECIMAL(20, 12),
    unit INT,
    made_date DATETIME NOT NULL
) default character set utf8 collate utf8_general_ci;
show tables;
이제 dag 작성을 시작해보자.
먼저 파이썬 코드로 get 요청을 보내고 이를 Pandas로 받는 코드를 작성해보자.
import requests
import json
import pandas as pd

# 최대 200건
url = 'https://api.upbit.com/v1/candles/minutes/1?market=KRW-BTC&count=200'
response = requests.get(url)
data_sample = pd.json_normalize(response.json())
data_sample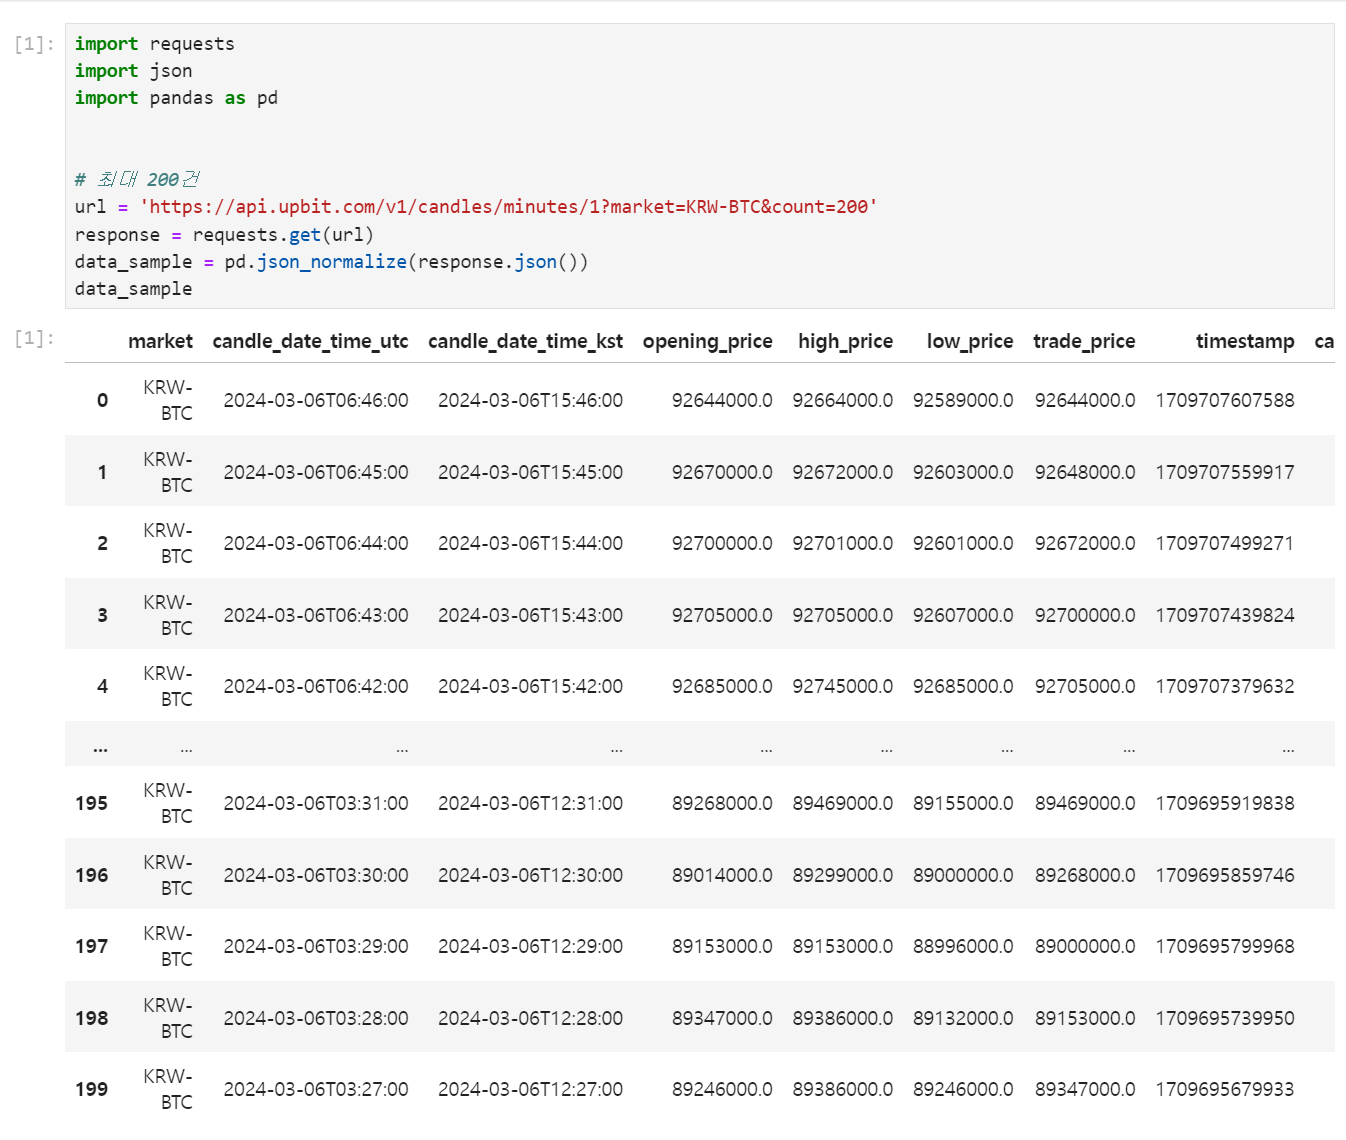
위와 같이 결과를 얻을 수 있는 것을 확인하였다.
이제 먼저 api를 보내고 결과를 mysql에 저장하는 오퍼레이터를 만들어보자.
일반적으로 재활용이 가능한 파일들은 /plugins에 저장하게 된다. 아래 명령어를 통해 plugins에 폴더와 파일을 만들자.
mkdir ./plugins/operators
vi ./plugins/operators/upbit_candle_api_save_to_mysql.py
주피터로 가서 해당 파일을 열고 구현해준다.
from airflow.models.baseoperator import BaseOperator
from airflow.hooks.base import BaseHook
import pandas as pd
import sqlalchemy
from airflow import macros

class UpbitCandleApiSaveToMysql(BaseOperator):
    template_fields = ("exec_date")
    def __init__(self, end_point, db_conn_id, table_nm, symbol, exec_date, **kwargs):
        super().__init__(**kwargs)
        self.api_base_url = "https://api.upbit.com/v1/"
        self.end_point = end_point
        self.db_conn_id = db_conn_id
        self.table_nm = table_nm
        self.symbol = symbol
        self.exec_date = exec_date


    def execute(self, context):
        candle_df = self._call_api()

        connection = BaseHook.get_connection(self.db_conn_id)
        db_connection_url = f"mysql+mysqlconnector://{connection.login}:{connection.password}@{connection.host}/{connection.schema}"
        connection = sqlalchemy.create_engine(db_connection_url)
        candle_df.to_sql(name = self.table_nm,
                         con = connection,
                         index = False,
                         if_exists = 'append')

    def _call_api(self):
        import requests
        from datetime import datetime, timedelta
        import time

        start_time = (datetime.strptime(self.exec_date, "%Y-%m-%d") + timedelta(days = 1)).strftime("%Y-%m-%d") + ' 00:00:00'
        result_lst = []
        self.log.info(start_time)
        for i in range(60 * 24 // 200 + 1):
            url = self.api_base_url + self.end_point + '?market=' + self.symbol + '&count=200&to=' + start_time
            self.log.info(url)
            response = requests.get(url).json()
            is_break = False
            print(response)
            for elem in response:
                if self.exec_date not in elem['candle_date_time_utc']:
                    is_break = True
                    break
                result_lst.append(elem)

            if is_break or len(response) < 200:
                break
            start_time = response[-1]['candle_date_time_utc']
            time.sleep(1)

        data_sample = pd.json_normalize(result_lst)
        data_sample['made_date'] = self.exec_date
        return data_sample
이후 dags로 가서 dags_get_upbit_BTC_1m_candle.py 파일을 만들고 아래처럼 구현한다.
from airflow import DAG, macros
import pendulum
from airflow.providers.http.operators.http import SimpleHttpOperator
from airflow.providers.mysql.operators.mysql import MySqlOperator
from operators.upbit_candle_api_save_to_mysql import UpbitCandleApiSaveToMysql

default_args = {
    'owner': 'airflow',
    'start_date': pendulum.datetime(2024, 3, 4, 0, 0),
    'schedule_interval': '0 0 * * *',
}

with DAG(
    dag_id = 'dags_get_upbit_BTC_1m_candle',
    default_args = default_args
) as dag:
    sql_already_data_delete = MySqlOperator(
        task_id = 'sql_already_data_delete',
        mysql_conn_id = 'conn-db-mysql',
        sql= "DELETE FROM airflow_test.upbit_btc_1m_candle WHERE made_date='{{ execution_date.strftime('%Y-%m-%d') }}'"
    )
    print("sql" + "DELETE FROM airflow_test.upbit_btc_1m_candle WHERE made_date='{{ execution_date.strftime('%Y-%m-%d') }}'")

    upbit_BTC_1m_candle_api_save_to_mysql = UpbitCandleApiSaveToMysql(
        task_id = "upbit_BTC_1m_candle_api_save_to_mysql",
        end_point = "candles/minutes/1",
        db_conn_id = "conn-db-mysql",
        table_nm = "upbit_btc_1m_candle",
        symbol = "KRW-BTC",
        exec_date = '{{ execution_date.strftime("%Y-%m-%d") }}'
        )

    sql_already_data_delete >> upbit_BTC_1m_candle_api_save_to_mysql
매일 UTC+0 0시 0분에 전날의 BTC 분봉 데이터를 모으는 DAG이다.
이제 airflow UI로 이동한다. 반영될때까지 5분 정도까지 걸릴 수 있다.
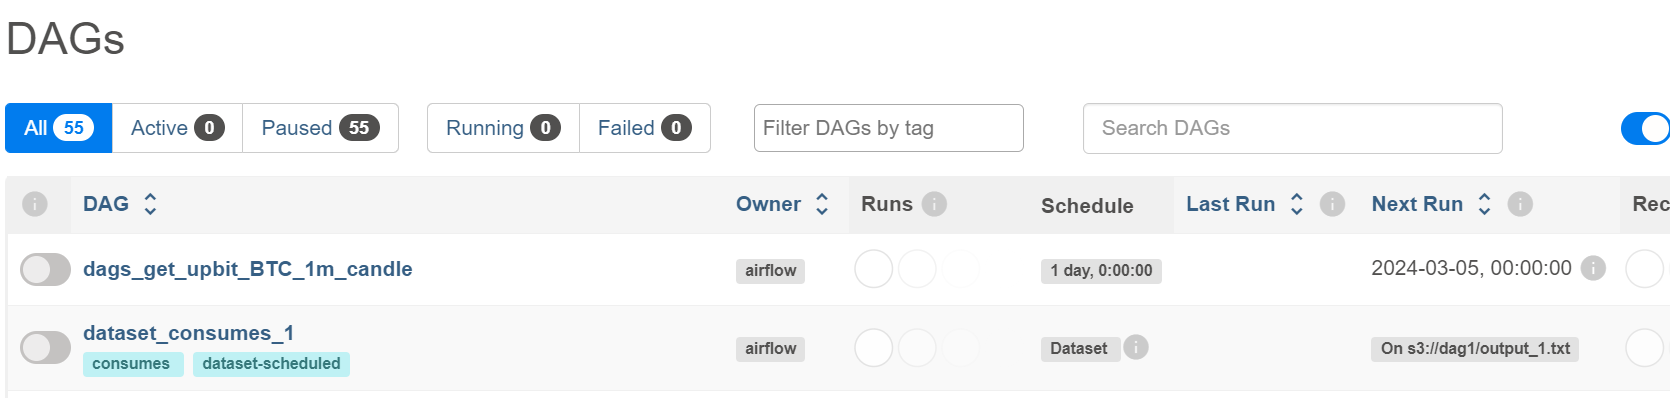
일단은 오류 없이 올라간 것을 확인할 수 있다.
이를 unpause 시키면…
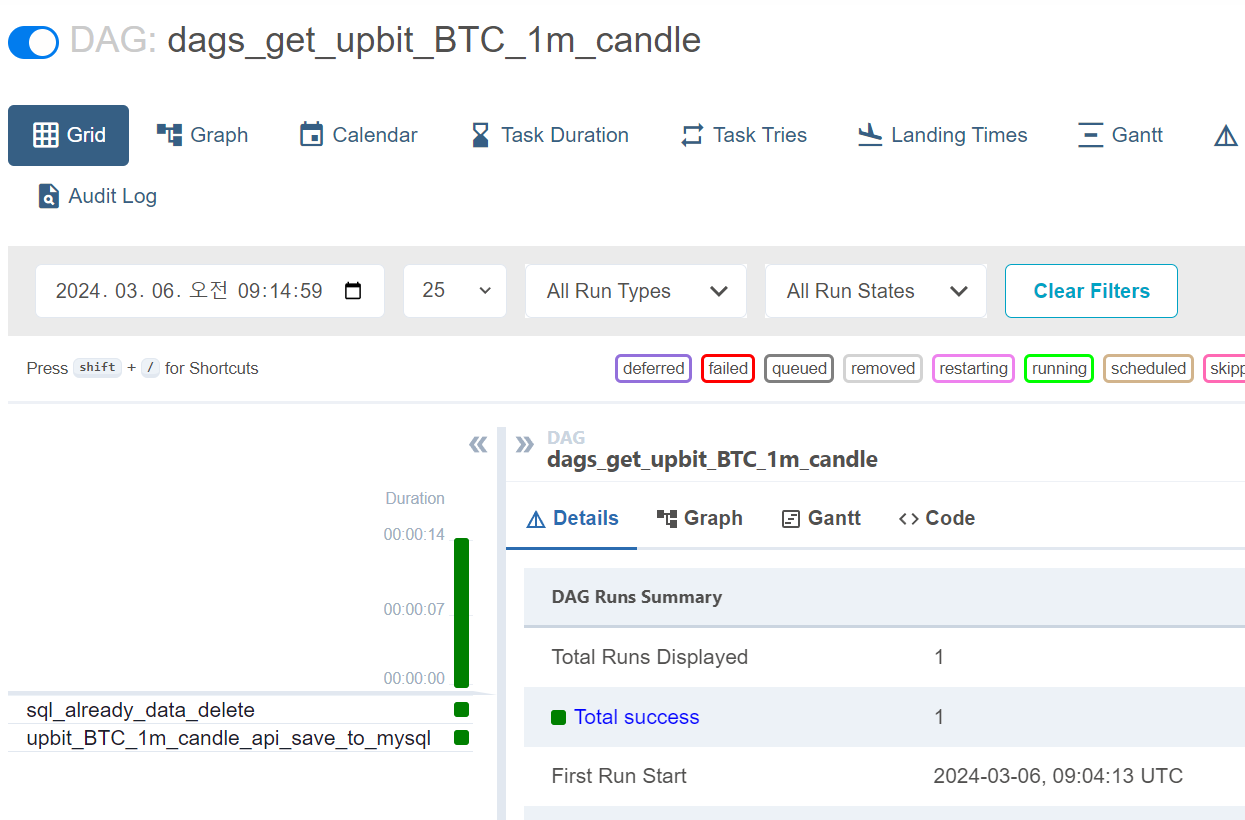
성공했다!!!
이제 mysql을 확인해보면!!
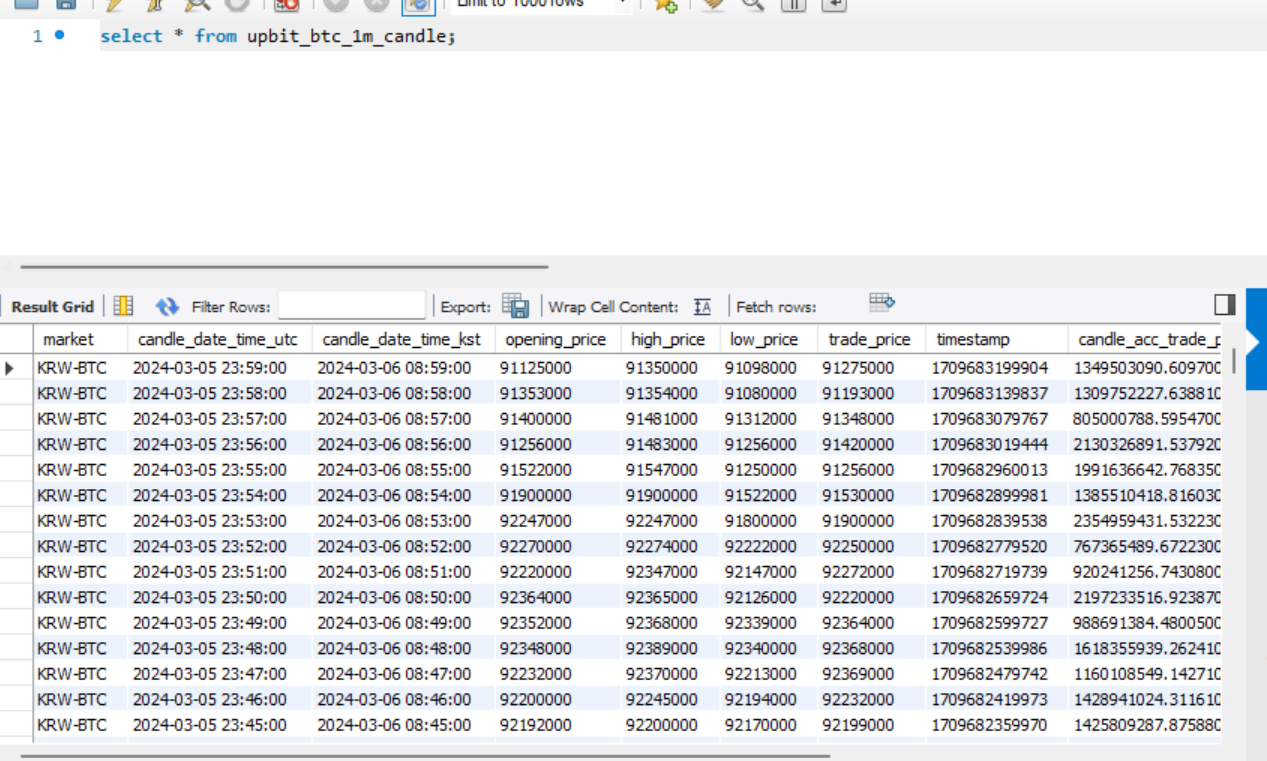
데이터베이스에 잘 들어간 것을 확인할 수 있다.
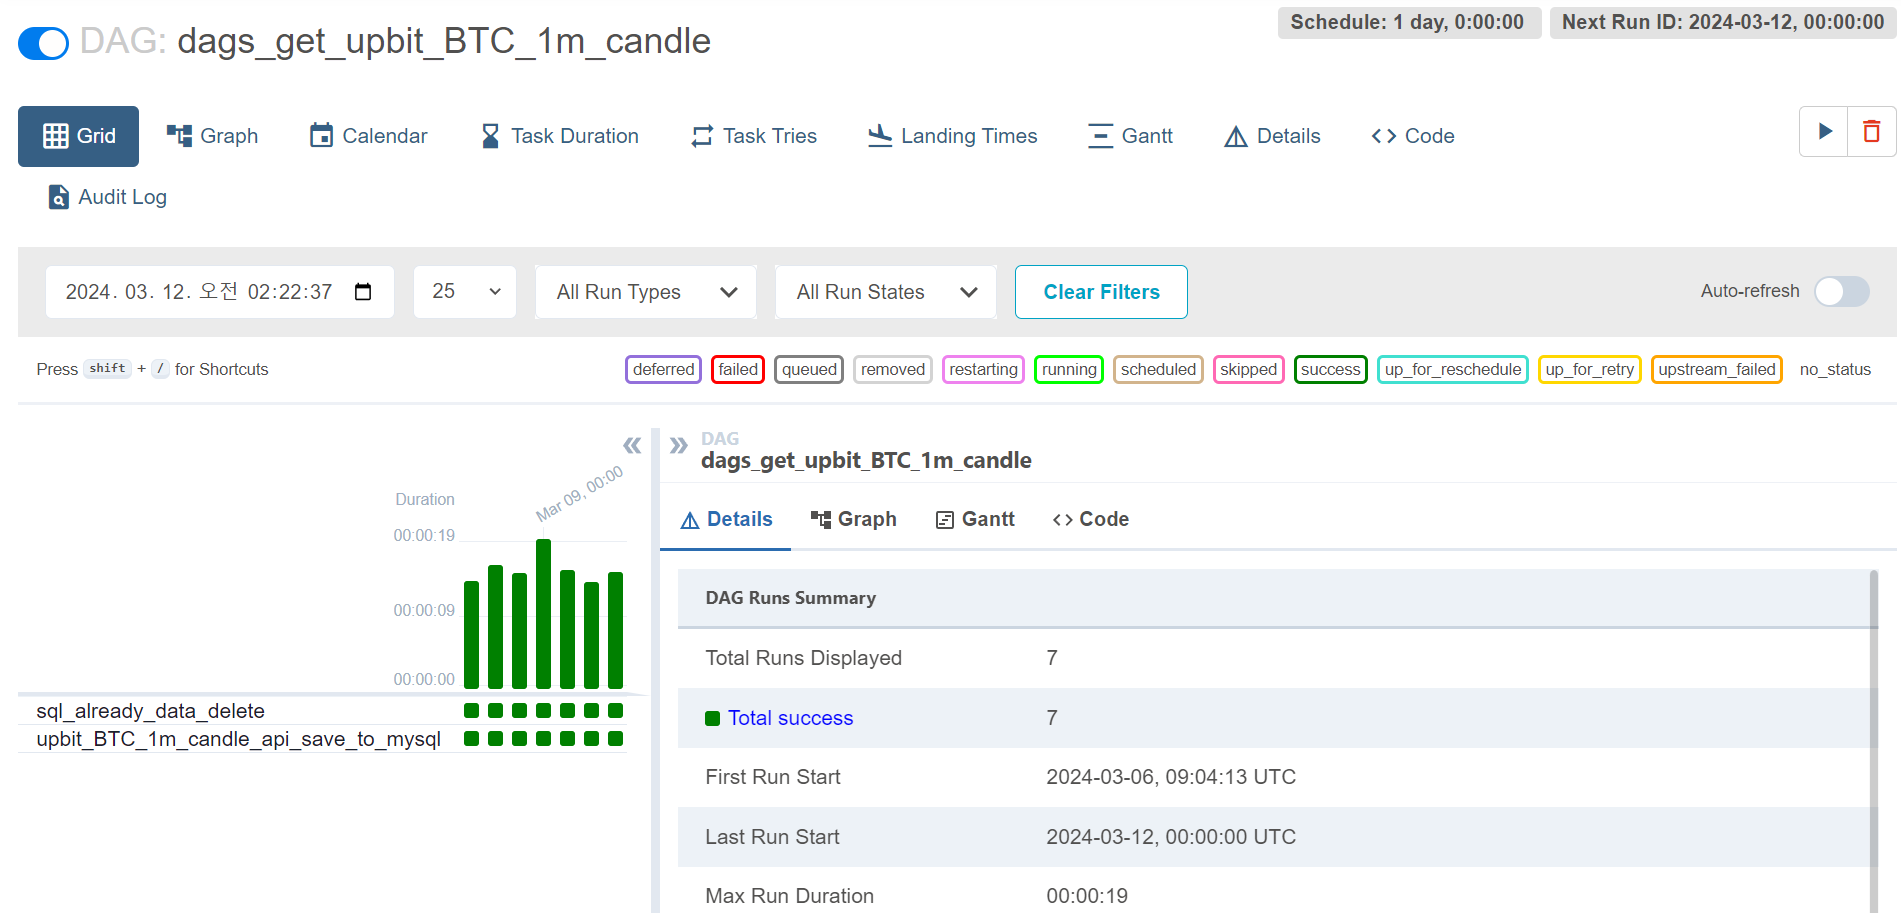
지속적으로 잘 되는 것도 확인할 수 있었다.
'공부 및 정리 > 데이터 엔지니어링' 카테고리의 다른 글
| [Kafka] Kafka 간단 정리 (0) | 2024.04.05 |
|---|---|
| [Airflow] 비트코인 일일 분 봉 데이터 파이프라인 프로젝트 (환경 설정편) (1) | 2024.03.06 |
| MapReduce (0) | 2024.03.06 |
| RDD (Resilient Distributed Dataset) (0) | 2024.03.06 |
| [Airflow] DAG (0) | 2024.03.04 |


